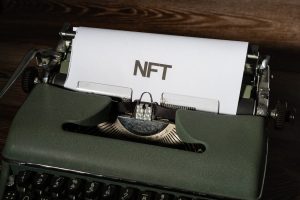
NFTs are one of the most masterpiece emerging technology. Many individuals are hyping the invention of NFTs and are seeing it as the first step in changing the virtual representation of real-world assets. NFT assets have gained popularity in recent times, with various NFTs artists earning hundreds of thousands from collectibles, music, and design through the help of blockchain technology.
Alternatively, this new era and hype of digital ownership have changed the art and collectible market through the invention of NFTs. Knowing about NFTs and the goldmine opportunities it has offered to creators, investors, or traders in a different part of the world, they are some NFTs enthusiasts who want to leverage this opportunity as well.
Well, if you are bamboozled on how to create NFTs, list them in a marketplace for sale, and monetize from them, this content will be elaborating well-detailed information about your confusion in serials of subsequent paragraphs.
What Is NFTs Minting?
This is the process of publicizing your token on a blockchain especially to make it buyable by traders in the NFTs marketplace. With the help of blockchain technology, an individual can easily convert the digital file into a digital asset that can be listed for sale or purchased. In most cases, NFTs are minted on Ethereum blockchain-based technology.
How To Create Blockchain?
Creating or converting your artwork into NFTs requires some processes. As a beginner who wants to learn or create NFT, the steps will be discussed in the subsequent paragraph.
1. Select A Blockchain:
This is the first thing to consider when creating your NFT. Select the blockchain platform you want to create your NFT. The most popular blockchain used platform is Ethereum. There are other several platforms that a creator can use such as; Solana, EOS, Cardano, Binance Smart Chain, etc. Before you make this selection, investigate the costs, and the kind of wallet it uses for each platform-specific requirement.
Usually, it is advisable to select the blockchain that best suits your requirements because the blockchain you select will permanently keep the record of your NFT that is to be created. After successfully creating your NFT, the blockchain selected cannot be changed.
2. Select A Crypto Wallet And Fund It:
To manage your cryptocurrency and NFTs select and set up a crypto wallet that matches with the blockchain that you selected. There is a tendency of losing your assets or access to your wallets if your wallet seed phrase or private key is not probably stored.
When minting your NFT, it is crucial to purchase the native crypto of your selected blockchain as that will be used as a gas fee payment when minting your NFT. Based on the kind of wallet that you are using for creating your NFT, you can buy this coin on the crypto exchange using P2P or credit card.
3. Select An NFT Platform:
Select a platform that matches your selected crypto wallet and blockchain to create your NFT. Due to the increase in the number of NFT marketplace, a creator can create NFT without much stress. Nevertheless, few of these NFT marketplaces allow the creation of NFTs from minting, listing, and selling of the NFTs.
4. Create Your NFT:
Based on the selected NFT marketplace, the specific procedures and criteria for creating NFT differ. As a result of that, before creating NFT, it is essential to get familiar with the platform interface. However, subsequently, below are the general procedures for creating NFT in a marketplace.
5. Link Your Wallet:
On the selected NFT marketplace, link your digital wallet to it by following the instructions.
6. Select the “Build NFT” Option:
look for “create” or “mint” on the NFT marketplace as that will help you through the NFT building or creation process. These options will involve; setting up the NFT features on the marketplace platform, uploading your media asset, and adding additional details.
7. Creating A Media File:
Based on the kind of digital art you want to create, the items used for building NFT differ. For instance, you have to investigate specialized or professional software for creating digital art such as; images, animations, etc.
8. Upload Your Media File:
The media you want to tokenize as an NFT should be uploaded.
9. Fill In The Detail:
Name your NFT and give detailed information about it. Reducing the number of NFTs that can be built or created is a great idea, although it might not be a good choice depending on the context.
10. Build Your First NFT:
After setting or providing important details on the NFT settings, click on the mint or create option. The NFT will be created after processing your request.
Summary
NFTs are transforming the world of digital assets by offering a simple methods to represent ownership and demonstrate the validity of a variety of digital assets, be it digital art, music, or videos.
More NFTs creators or builders are joining the trend of this technology and exploring the mechanism of this technology as making NFT is getting more and more feasible. However, also remember that NFTs are more than just creating them as people want to see and use them. It is also advisable to understand some important factors such as; valuation and cost price.


